Residential and Commercial Painting Services

Your Trusted Professional Painters in USA

Call Us

We are happy to take your call and schedule a convenient visit to your property.

Schedule an Appointment

For your convenience, we will add your project to our schedule.

Industry experts

Our Professional Painters provide you with customized service at no extra cost.

We come to You!

We will visit your property to discuss your needs and put together a custom-free estimate.

Why Choose Us

Planning to give your property a fresh coat of paint? Hire us today and experience:

Affordable Price Rates

No matter what service you opt for, we always offer competitive market prices. We do so without sacrificing quality, ensuring a flawless finish every time.

Wide Range of Services

From residential to commercial, exterior to interior, cabinets painting and staining, you can find a painting service to fit your requirements for your property. 

Guaranteed Workmanship

Our experienced painters guarantee your property gets the treatment it needs. They have years of expertise in the field. We treat our customers with utmost respect. 

10+

Years Of Experiences

Reliable Professional Painting Company

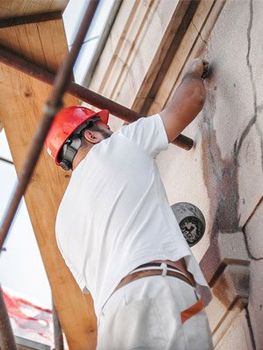
Painting your home or office is more than just slapping some paint on the walls. For the project to be a success, it requires a steady hand, a keen eye, and years of experience. Fortunately, our residential and commercial painters possess all these traits and more.

2 Years Satisfaction Warranty

Flexible & Cost-Effective

1st Painting Contractor aims to help home and business owners enhance the value and appeal of their property. Our team uses only the highest quality materials to achieve a flawless finish. This includes paintbrushes, rollers, paints, tints, and more.


When you hire us for your painting project, we will ensure to meet the painting industry standards, and deliver quality workmanship without jeopardizing you and your property's safety.

Discover More

870+

Successful Projects

850+

Happy Customers

20+

Positive Reviews

We Offer These Painting Services

We offer an extensive range of services and we do each one in the most professional and efficient manner. Some of the services we provide are:

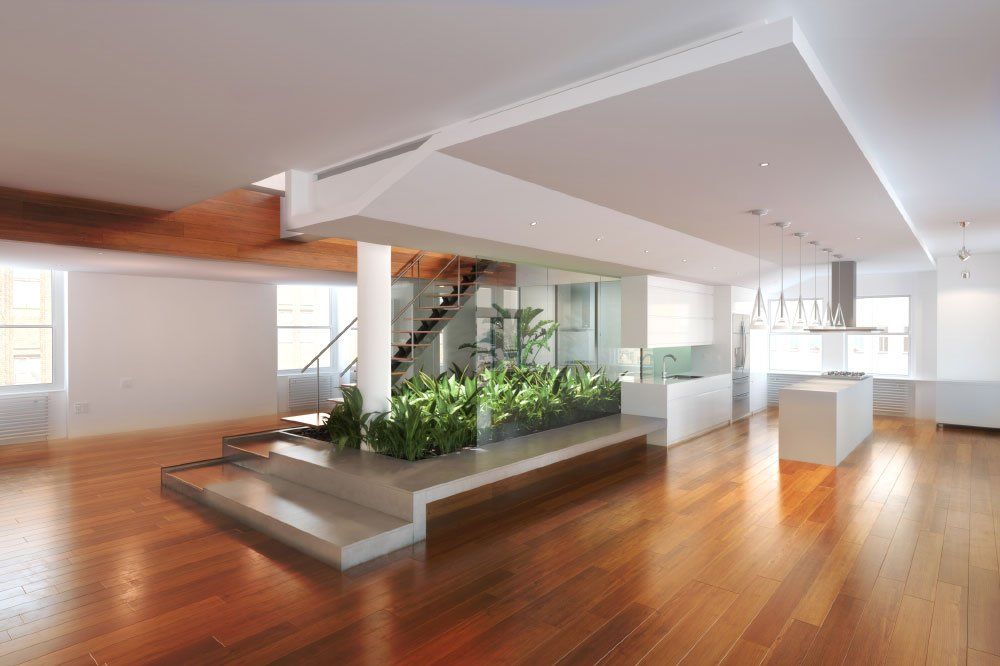
Interior Painting Service

Elevate the look of a the master bedroom and increase your property's resale value in the process. Make your interiors look stunning without breaking the bank.

Exterior Painting Services

Painting your building's exterior not only enhances it but also protects it from the elements. Lengthen your property's life and save money with our top-notch service.

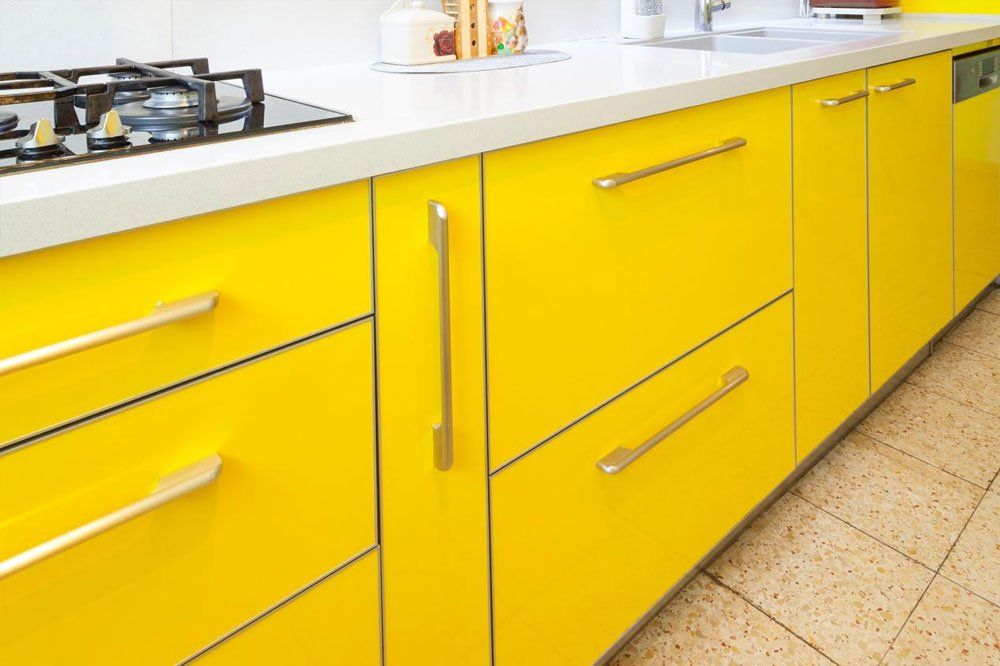
Kitchen Cabinets Painting

You don't have to replace your cabinets because they're old. You can breathe new life into them without costly renovations. Just add a fresh coat of paint! 

Mural Painting Services

Murals are hot in the world of interior design. Beautify the space in your home by applying some fresh murals and giving it the look and feel you want. Your options are endless!

Door Painting Services

A good-looking door can boost the curb appeal of your property, giving it a professional look. Enhance old, worn-out, doors with a splash of new paint.

Tile Painting Services

Completely transform the look of your bathroom or kitchen. Elevate the appearance of your space with this simple and cost-effective makeover.

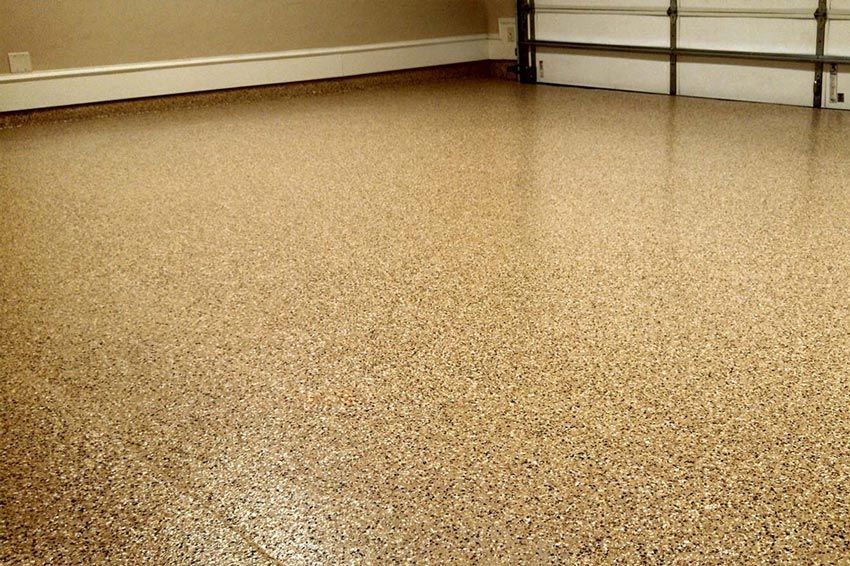
Garage Floor Refinishing

Leaving your floors unprotected from the elements will erode them. Bring them back to life by adding floor coatings. Keep them in top shape and beautify their look.

Paint Removal Services

Tired of looking at the fading old paint? Refresh your home. Remove your paint falling out of fashion without damaging your walls. This is the first step to a successful paint job.

Deck Staining Services

Your deck deserves to look as good as the rest of your property. Apply a fresh coat of stain to restore its beauty and protect it from wear and tear.

See More Services

Turning Plans into Reality

Superior craftsmanship and unmatched results are top priorities in our books. All customers love the outcome of their project. Here are some pictures of our recent projects:

Our Customers

What Clients Says

Our clients are our best advocates. We never fail to satisfy them, and the reviews below goes to show it:

  • “Martin and his team are the best! Excellent work, superior customer service and very affordable. I would highly recommend hiring 1st Painting Contractors for your next project.”

     Ex Tera Kasal


    Button
  • “They did an immaculate job, great price and great execution, they are definitely my go-to painting place from now on. Thank you again and we are very pleased with the job you’ve done. Highly recommended and very professional and courteous.”

    Nicole Price

    Button
  • “1st Painting Contractors did a very careful job for the interior of my townhouse. The painters left an immaculate new appearance in my home. I am refreshed by the new look on all the walls. I would recommend 1st Painting Contractors for anyone looking for professional painters. I will definitely use them again.”

    Client Name

    Feedback

    Button
Read More

Found What You're Looking For? Call Us Now!

Create the perfect look you want for your home. Choose from a variety of design color themes. Give your house that special appeal you have always dreamed of.

Here's an overview of the preparation process:

Sand Off Walls

It's important to sand your walls and leave a smooth surface. The next step is to thoroughly clean your walls from dust and other debris.

Patch Holes

We need to prep all the walls first, patching holes, cracks, dents and uneven surfaces to have smooth walls ready to receive primer and paint.

Paint Your Walls

We may need to prime the walls first. If uneven surfaces appear, we prep them again until they are fully even. Next we apply the first and second coat of premium paint.

Artists Behind the Magic

Our Team

With veteran painters and creative artists at our disposal, we're ready to provide you with attention to detail for the best outcome. Meet our team members and get an idea of the experts who will do all the magic.

Get a Quote

Get A Free Estimate Today!

Contact our representatives and get a free-estimate quote without any obligations. We guarantee affordable-cost yet highly-effective services. Let us improve the look of your space with an exquisite touch of color today!

Contact Us

Our Painting Process

STEP ONE

Preparing the House for Painting

* Clean the surface of the house

* Remove any defective paint

* Make any necessary repairs

* Figure out how much paint you're going to need

* Prime the surface

* Choose your paint

* Mix your paint

STEP ONE

Painting the House

* Decide which paint application method to use:

* Brush, Roller, Spray

* Paint the sidings

* Apply a second coat

* Paint the trim

STEP ONE

Clean up & Final Release

* Clean all debris

* Make sure no paint traces are left

* Put everything back in place

* Third party final inspection

* Leave your house immaculate

* A Luxury Painted House is Ready

Get a Free Estimate

News & Updates

News & Blogs

Learn about the latest in home improvement news and renovations. Our blog has informative articles on numerous related topics. 

By Umang Chugh 15 Feb, 2023
When your current kitchen countertops are in fairly good shape, but you want them to have a fresh new look, you should consider repainting rather than replacing them with new ones to get the new color to match your kitchen theme. Start by thoroughly sanding the countertop surface with 220-grit sandpaper, then clean the dust with a damp cloth with mineral spirits. Let it dry for 2 hours and rub your hand on the surface to ensure it’s all clean. Next, cover all the areas you don’t want to paint with painter’s tape and plastic. Start applying a coat of primer and make sure you cover all areas. Let it dry for 6 hours before you start applying the paint color of your choice – wait another 4 hours – and start applying a final high gloss topcoat to give your counter shine and protection. After applying the first coat on the entire surface, let it dry for 4 hours and apply a second coat to create a magnificent look and protected surface. Allow 24 hours after the final topcoat before using your countertops. Enjoy! Items You Need for Laminate Countertop Painting Laminate Countertop Sanding Items You Need for Your Project Sand the Countertop Lightly Laminate Countertop Cleaning with Mineral Spirits Priming Laminate Countertops Clean All Surfaces with Mineral Spirits Cover with Painter’s Tape and Apply Primer Priming the Edges Laminate Countertops Painting Laminate Countertops Apply Primer to Cover All Edges Paint All Surfaces After Priming Transform an old kitchen countertop without removing it. We will show you how to make a big impact without a big investment. Here are the materials and tools you will need: 220 Grit Sandpaper Sanding Block Painter’s Tape 9” Paint Roller 9” Foam Roller Cover Paint Tray Primer for Glossy Surfaces Water-Based Acrylic Paint for Countertops High Gloss Acrylic Topcoat Paint Mineral Spirits for Cleaning up Latex or Nitrile Gloves High-Quality Trim Brush You can prime and paint your Laminate countertops and quickly transform the kitchen’s aesthetics. Your local paint store will be able to supply you with the best type of paint to use for this type of project. Type of Primer and Paint You Will Need Many recommend a water-based acrylic primer, paint, and topcoat as they provide the hard surface you need for heavy use areas like countertops. Why Should You Use Water-Based Paint? Water-based acrylic paint cleans up easily with water. It’s a good idea to sand any surface before you paint. Use extra fine-grit sandpaper to remove any rough spots on your counter and backsplash. An electric sander will make this job go much quicker. Prepping Your Countertop Once the entire area is smooth, pour some mineral spirits onto a lint-free cotton rag and wipe the countertop thoroughly. Make sure the entire area is totally smooth and free from dust. Allow the mineral spirits to dry and run your bare hands over the surface to make sure that it is indeed smooth and clean. Cover All Areas You Won’t be Painting Now that the countertop is prepped for painting, you will want to protect everything you’re not going to prime and paint. Use painter’s tape and plastic or paper to protect the sink and walls. Ensure that your tape has fully adhered to the surface, and there’s no chance of paint sliding under. It’s important to protect your walls, floors, or cabinets by covering them with plastic or paper. Once your surface is fully prepared, turn on the kitchen fan or open a window. Painting Your Laminate Countertop A smooth laminate countertop requires an acrylic primer intended for glossy surfaces. Make sure that your primer and paint are well mixed. It’s a good idea to have more roller covers than you think you will need. Purchase more than enough, and you can return to the store whatever you don’t use. For smooth surfaces like countertops, we recommend a foam roller cover. This step guarantees that the paint goes on smoothly. While priming and painting countertops, it is important to keep a wet edge for your paint application. Keep Painting Until You Finish Do not stop this project in the middle and allow the area you just painted or primed to dry as this creates a line between coats. Overlap your newest roller stroke’s an inch or so over the previous strokes as this will help in feathering the paint. Apply an even coat of primer covering the entire surface with full roller strokes from the front to back. Why Do You Need to Keep a Wet Edge? Keeping a wet edge is very important to the final look of your painted countertop. As you approach the area around the sink or the small backsplash surface, be ready to use a quality trim brush to cover the surface as your wet paint edge encounters it. Move from one edge of the countertop to the other, covering the entire area with primer as you go. What is Normal Drying Time? Allow your primer to dry for at least six hours. Applying the paint is the same process as the primer. Keep a wet edge of paint as you move from one side of the counter to the other. Do not allow the edge you just painted to dry before rolling on the next coat of paint. Overlap your paint rolls for about an inch and allow your paint to dry for at least four hours. What is the Final Step Painting Your Countertop? Then apply a second coat using the same technique. Once the final coat of paint has dried, you will want to apply a final high gloss topcoat to give your counter a bit of shine and protection. Use a water-based acrylic topcoat destined for use on countertops. Roll on the topcoat using the previous technique, keeping a wet edge. Once you coat the entire surface and has dried for four hours, you should apply a second coat. Two applications of topcoat should be sufficient to create a splendid and protected countertop surface. What is the Full Curing Time for the Paint to Dry Completely? Wait 24 hours after the final topcoat application before using your countertops. The full cure time for a water-based acrylic topcoat is approximately 14 days. Use your countertops gently to make sure you don’t scratch them. If you follow these simple steps, you’ve completely transformed your countertops without even breaking a sweat or overcharging your pocketbook. Even if we didn’t change anything else – not the gold speckled laminate countertops, not the appliances from the 80s, nothing – painting the cabinets alone makes it feel like an entirely new kitchen.
By Umang Chugh 15 Feb, 2023
The coming year, 2020, will see changes in many areas of Living Room Color schemes. Numerous brands are already making predictions regarding the interior house paint color ideas that will be popular in 2020, and we will be at the fore front setting the pace. Our team of professional painters in Orange County have observed the interior design market and noted some color ideas that customers are likely to adopt for their houses next year, and you can adopt them too. If you are looking to change the color of the interior of your house, whether it is the bathroom or the living room, then these color ideas are for you. Some of these color ideas are applied as at least two-color tone paints combinations, while others are single color paints combinations. Lilac Gray lilac gray paint If you love cheery colors that are also gender-neutral, the lilac gray is for you. The color features gray that has been injected with lilac to increase its warmth. In Orange County, designers are fond of using a variety of gray shades, and this option can be an exciting alternative. Lilac injected colors have been popular in 2019, and this gray option will likely remain popular in 2020. A professional house painter can easily enhance the mood of your space with the lilac gray. Muted Pastels muted pastel paint colors Are you looking to stand out? Are you looking for paint colors that will not be popular among everyone? If you are, then muted pastels are ideal for you. They are not bold, and they work to ensure you are not bored with them easily. Muted pastels are gender-neutral and our interior painting contractors can use them in common areas in your house, like bathrooms and kitchens. What’s more, their use conceals regular scuff marks. In addition to muted tones, pastel derivatives can also be chalky. Chinese Porcelain chinese porcelain paint color The Chinese Porcelain color is suitable for reducing anxiety, promoting calmness, and encouraging sleep. It is a rich jewel color that offers more than aesthetics. The color is a soothing blue, and it will encourage you to practice mindfulness. It will also promote slowness, and you will be more present in your life while feeling more hopeful. Use it on the interior side of your doors and as an accent wall. Gray and White gray and white color scheme bedroom For a minimalist space, gray and white colors are ideal for the walls. The combination of the two colors is not only spectacular, but it also makes the room look modern. To enhance the modern look, you can have blueish furniture. You can also use other colors and styles with these hues on your walls. Beige beige paint colors Another neutral color to use in your cozy space is beige. You can apply it on one wall while maintaining the original colors of the other walls and ceilings. Then, ensure some of your decorations and furniture are also beige. The color allows you to completely redecorate your space. Soft Clay soft clay paint colors A perfect alternative to the beige hue are the soft clay paint color shades. These include terra cotta, clove, burnt orange, and caramel colors. They are not your ordinary neutral hues, and they have a great deal of personality. Our professional interior house painters in Orange County, CA advise that you must use the latest paint colors that feature soft clay tones. Mustard Paint Color Mustard Paint Color Are you looking to create memorable signature styles with your paint color? Then mustard is the color for you. You can use the moody and muted hue sparingly to form provocative depth. The small use of the color allows art and décor to be highlighted brilliantly. If you want a substitute for gold color, then mustard is perfect for the job. It is a great addition to your walls, and you can accentuate it with furniture of a close color. Mushroom Paint Color Mushroom Paint Color If you want another gender-neutral color for your living room or other common spaces, mushroom shades will work for you. Mushroom colors are not only unique, but they also look appealing with natural finishes and furniture. In case you are still stuck with rust and mousy brown paint colors in your old house, updating them with mushroom hues will allow you to renovate your home and still maintain your style. First Light Paint Color First Light Paint Color First light is a rosy and soft color that promotes optimism by encouraging you to use a variety of colors as the backdrop of your rooms. And it seems that there is a broad spectrum of gender-neutral colors because this one is part of that category. First light offers an ideal substitute for beige, gray, or white. It is not only fresh, but it is also modern. Mist Paint Color Mist Paint Color To get a mist hue, your professional house painter will need to combine muted pastel green and blue with lilac and gray undertones. This color style allows you to play with many colors. If you are looking to hide blemishes effortlessly, then a misty paint color is ideal. Pewter Paint Colors Pewter Paint Colors Pewter paint colors feature a combination of gray and beige. This perfect substitute for white walls can be used in every room of your house. It can work with any color shade of your furnishings in any space. Dark Green Paint Color Dark Green Paint Color Green is the color of nature, and the dark green hue provides a room with a healing vibe. It gives the feeling of lush vegetation and nature. Our professional painters think that this color can make a small room appear darker than it is. So, they advise that you should use it in massive rooms with sufficient lighting. Hazelnut Hazelnut For a comforting, inviting, and warm hue, creamy hazelnut shades are ideal. If there is a room in your house that is too dark and needs some brightness, this paint color is perfect for your comfy space. The paint color will reflect light and give the illusion that the room is bigger than its actual size. With hazelnut shades, you are sure that your furniture will blend well with the palette. Love Red red paint colors for bedrooms Powerful colors are exciting, but they can easily bore you with time. But if you like taking a risk and are okay with changing the color of your space often, the love red color is perfect for your living room. To make it work, ensure that your furnishings are gray while all walls are painted red. Some accents like pillows and tiles can also be red. Earth Tones earth tone colors for living room If your furniture has intense colors, you can make them work with walls painted in earthy tones. They help you achieve an elegant space you will come to cherish. These tones are also perfect for the bedroom. What are the take aways from this article? As you buy paint for your interior, remember to establish the kind of finish you want. You can get paint with either an orange peel or a smooth finish. If you want to hide some blemishes on your wall, be sure to buy paint with the orange peel finish. This finish also gives your wall an aesthetic appearance. But if you like your walls looking perfect, and you have a sizable budget, you can buy paint that has a smooth finish. While these are the main types of finishes, you can request your professional painter for other finishes, like comb, wrinkle newspaper or slap brush textures. One thing color can do for the interior of your house is give it a character. A color like green makes your home feel like you are in nature, while the Chinese Porcelain paint color helps you exercise mindfulness. All these colors have deeper significance than the aesthetic traits they hold. When you use the wrong paint color combination, these colors can give your interior decor an unfinished look. Your room will feel like something is missing. But when applied properly and the various accents are used well, your room will feel the elegance and completeness it deserves. This is the ideal outcome you want for the interior of your house. Apply any of these hues this coming year and beat the neighborhood standard as you set a new style others would want to emulate.
By Umang Chugh 15 Feb, 2023
Liquid Stainless Steel is a water-based paint that will completely cover your appliances with a durable and attractive stainless-steel surface. There’s no need to disconnect appliances, and you don’t need to take food out of the refrigerator. Use the following items for best results: Painter’s Tape Liquid Stainless-Steel DIY Paint Kit Screwdriver Paint Tray Two Roller Covers of a Roller Handle Two-Inch Brush 11-inch brush Base Coat Clear Topcoat Step by Step Instructions You can find the links to all these materials in the description down below. Follow these easy steps to get the best results: Start by cleaning your appliance with a window cleaner or a 50/50 mixture of ammonia and water. Use a paper towel to dry the surface and make sure there’s no remaining residue. Use painter’s tape to cover off all the parts you don’t want to paint. If you can easily remove the handles or knobs, that’s even better. Use a magnet to see which surfaces are metal: If it is, you’re ready for liquid stainless-steel application. If the surface is not metal, you’ll need to prime it first. Use Zinsser Bullseye one, two, three water-based primers available at any home improvement store. Apply the primer using the same brushstrokes you’ll use with your liquid stainless to ensure the finishes are consistent. Before opening the liquid stainless steel can: Shake it before opening Stir it and often stir throughout the process Shake and stir the base coat well before using it. The stainless flex may have gathered in clumps at the bottom of the can. While you are starting to unclog the meshed clumps with the stir stick against the side of the can, do it in such a manner as to help break up the clumps. This may take a few minutes, then pour a small amount into your paint tray to begin painting. Follow this method for painting your refrigerator: When painting the fridge, start with the inside of the doors. You can paint the insulation strip on the side. Don’t paint the face of the strip. Continue all around the inside of the doors. Paint the sides one side at a time Remember, you may paint a glass open door with liquid stainless, but never paint over your doors observation window. Follow these procedures to start painting your refrigerator: Use the provided three-eighths roller to start the first coat. Follow up with the foam brush. Push hard in a single-wide stroke to remove any bubbles Continue over all the surfaces. All your brush strokes need to be in the same direction. Use the provided foam brush to apply evenly. Paint your refrigerator in a vertical direction Using the foam roller roll on the refrigerator, start with the base coat with long vertical strokes. Then, while the coating is still fresh, use the wet brush to smooth it out with the 11-inch-wide foam brush using long vertical bottom to top, overlapping brush strokes. Here we are using the same concept as before, where we are applying the base code in long vertical strokes covering the entire area. I’m using the two-inch foam brush for the top, the side, and the bottom portions, then I brush it smooth with the 11-inch-wide foam brush. Repeat the same steps on all sides of your refrigerator. If you’re painting your range, dishwasher, or another small appliance, use your foam brush to brush on your liquid stainless and make a final pass using long end to end one-way brush strokes. Apply the stainless-steel paint for your stoves and dishwashers in a left to the right application. It’s the best way to match the original surface. What is the waiting period between paint coat applications? After finishing the first complete coat, wait 60 minutes before moving to the second coat. If you’re doing more than one appliance, move on to the second appliance while you wait for drying on the first one. For best results, apply thin coats. Keep in mind to apply multiple thin coats, so don’t be too concerned about how much the first coat covers. After you have finished applying the first coat, it will look thin and uneven. It will fill in as you apply more coats. By the second coat is already starting to look like it’s only steel finish. You may need three to five coats for full coverage. It’s essential to apply in light, thin coats. I applied three coats in total. Shake and stir the topcoat very well before using it. Apply in the same way you applied the base coat, utilizing vertical strokes, covering the entire area, and then using the 11-inch-wide foam brush to remove any excess. Repeat these entire steps on all sides of the refrigerator. Continue with a second coat, and then after 60 Minutes, finish with the third coat. You can clean your brushes with warm water to get ready for the clear topcoat. Wait two hours before applying the clear topcoat. Just keep on stirring the paint until the end. Don’t shake the can once you have already opened it. Instead, apply it using the same method and brush strokes you used with your liquid stainless steel. How many coats do you need to apply? Apply one coat for a Satin finish Complete two coats for a Semigloss finish End with three coats for a High gloss finish When you’re done with the last coat, wait two hours before closing your doors and removing the tape; score the tape with a knife to avoid pulling any paint from the surfaces. And here is the final result, the appliances makeover is complete, and you’ll be truly loving the way it looks. You’ll be surprised at how good this would turn out. You can easily transform your appliances at a fraction of the cost to hire a painter. This paint process truly allows you to upgrade and enhance your well-working appliances. How soon can you start using your appliances? You can use your refrigerator appliance right away, but give your stovetop a day to set, then relax and enjoy the beauty of classic stainless steel.
Share by: