
Door Painting Services
Interior Services
Exterior Services
Floor Services
Drywall Services
Removal Services
1st Painting Contractors did a very careful job for the interior of my townhouse. The painters left an immaculate new appearance in my home. I am refreshed by the new look on all the walls. I would recommend 1st Painting Contractors for anyone looking for professional painters. I will definitely use them again.

Best Tips To Paint Exterior and Interior Doors
Doors serve as more than just gateways; they're silent guardians of our homes, adding personality and defining entryways. But over time, wear and tear can leave them looking faded and lackluster. With the right approach, you can breathe new life into your doors, enhancing their aesthetics while protecting them from the elements.
Painting your doors isn't just about aesthetics, especially when you aim to paint interior doors for cohesive home decor. It's an investment in the beauty and long-term health of your home.
A fresh coat of paint on the face of the door can instantly refresh your entryway, adding a touch of color and style to match your home's personality.
On top of that, it acts as a protective shield against:
- Weather - Sun exposure, rain, and humidity can wear down the surface of your door, leading to cracking and peeling. Paint creates a barrier, safeguarding your door from these elements and extending its lifespan.
- Scratches and scuffs - essential considerations when choosing door paint that's durable for high-traffic areas. Daily use inevitably leaves its mark on doors. Paint hides minor imperfections and scuffs, keeping your doors to paint looking pristine for longer.
Picking the right paint and tools is crucial for a smooth, long-lasting finish. Here's your checklist:
Paint:
- Interior vs. exterior - Learn how to paint both, with specific techniques and tools like the paint sprayer for the best results. Choose paint specifically formulated for your door's location (interior or exterior). A latex-based flat paint comes in handy for both scenarios, offering versatility. Exterior paints offer additional weather resistance.
- Durability matters - Go for paints with high durability, especially for high-traffic areas like front doors. Consider enamel or latex paints to paint your front door for their resistance to wear and tear.
- Finish preference - Consider whether you're painting should have a matte, eggshell, or glossy finish for the best aesthetic and durability. Choose between glossy, satin, or eggshell finishes. A gloss paint offers a shiny finish, while satin and eggshell provide a softer, more subtle look. A second coat of paint can enhance either finish, depending on your preference.
Tools:
- Brushes - Invest in good-quality brushes of various sizes for detailed work and larger areas. These make painting seamless and smooth. They lessen the time to paint.
- Rollers - Sometimes a brush to paint is preferred for certain textures, but rollers and paint sprayers are great for the initial coats. I could choose to paint with a microfiber roller for smooth coverage on flat surfaces.
- Drop cloths and painter's tape - Protect your surroundings from paint splatters by using a small roller to roll for more control.
- Sandpaper - For prepping the surface and smooth out the paint imperfections.
Location plays a critical role in paint selection. Consider these factors:
- Sun exposure - For sun-facing doors, choose UV-resistant paint to prevent fading. A latex-based paint with these properties can offer the best protection.
- Humidity levels - In humid climates, moisture-resistant paint is essential to prevent peeling.
- Temperature extremes - Consider the best tips for painting a door in varying conditions. Choose paint that can withstand the temperature fluctuations in your area, especially critical for exterior doors but also relevant for the durability of paint on interior doors.
Tips for Painting Exterior and Interior Door - Painting Preparation
Adequate preparation ensures a stunning, long-lasting paint job on your doors.
I prefer high-quality latex or acrylic paint specifically formulated for interiors. These paints offer excellent durability, are easy to clean with soap and water, and come in a vast array of colors.
For high-traffic areas, I’d recommend enamel paint for its exceptional toughness and resistance to wear and tear.
The harsh outdoor environment demands robust protection. Select exterior-grade latex or acrylic paint, formulated to withstand weather elements like UV rays, rain, and humidity. Oil-based paints offer superior durability but require mineral spirits for cleanup and have longer drying times.
Invest in good-quality brushes of various sizes, including a small roller for precision work. Natural bristle brushes work well with oil-based paints, while synthetic brushes are ideal for latex or acrylic paints.
A small angled brush tackles corners and details, while a larger flat brush covers broader areas.
A microfiber roller delivers smooth coverage on flat surfaces. Choose nap size based on door texture: short nap for smooth doors, medium nap for slightly textured surfaces, and long nap for heavily textured doors.
Some of the other tools you can consider include a paint sprayer and a brush to paint for different effects.
- Drop cloths and painter's tape - Protect surrounding areas from paint splatters, particularly the edges of the door, to ensure a clean work area.
- Sandpaper (120-grit) - Smooths the door surface for better paint adhesion.
- Putty knife and sanding block - Apply and smooth wood filler.
- Screwdrivers - Remove and reinstall hardware.
- Safety glasses and mask - Protect yourself from dust and fumes.
I’d always recommend removing the door from its hinges to make it easier to paint. So how do you go about this? First, understand the best tips for painting and ensure you have the right tools, such as a high-quality brush to paint intricate areas.
- Unscrew the hinges - Use the appropriate screwdrivers to carefully remove the screws holding the door to the hinges. This is an essential step to paint a door like a pro and achieve a flat door finish.
- Lift the door gently - With assistance if needed, lift the door straight up and away from the hinges.
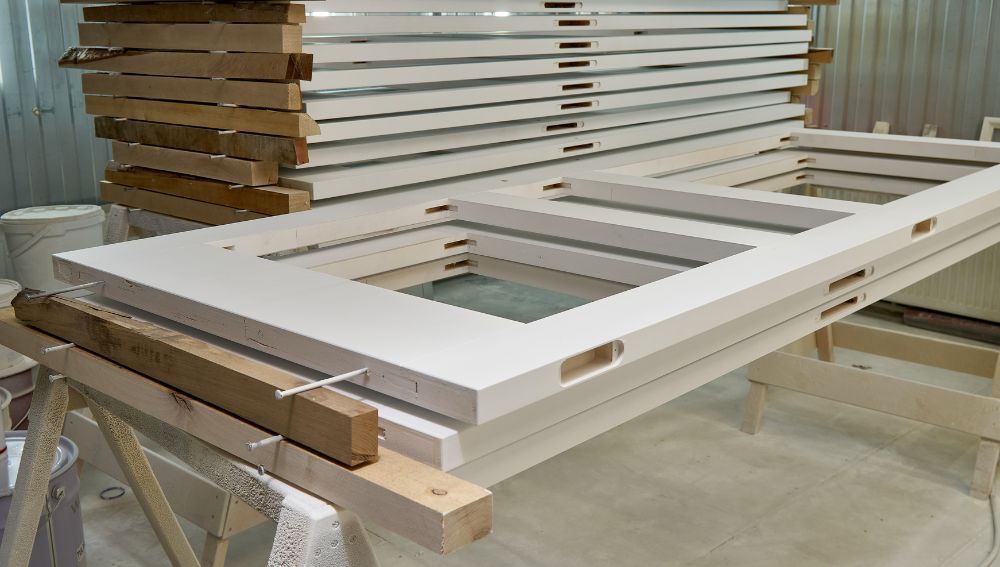
- Place the door on saw horses - Lay the door flat on two sturdy sawhorses for easier painting access.
Doors in place painting is feasible for small, simple doors. Cover surrounding areas thoroughly. Use painter's tape and drop cloths to create a barrier around the door opening. After that, securely wedge the door open. Ensure the door stays open and stable throughout the painting process to effectively cover the entire door surface.
For hardware removal and storage, unscrew the hardware carefully. Use the right tools to remove the door knobs, handles, and locks, ensuring there's no hindrance when painting the edges of the door. Label each piece with its corresponding location for easy reassembly (e.g., "Top Hinge - Left Door"). Place screws and hardware in labeled bags or containers to prevent loss.
Do the following to prepare the area for painting:
- Find a spacious, well-ventilated area - Choose a clean, dust-free location with good ventilation for painting.
- Set up two sturdy benches - Lay the door flat on two leveled benches for comfortable painting access.
- Cover surrounding surfaces - Use drop cloths or plastic sheeting to protect floors, furniture, and other objects from paint splatter.
- Ensure a dust-free environment - Sweep and vacuum the area to minimize dust particles that can settle on the wet paint.
Surface Preparation Process (How to Prep your Door)
Start by giving your door a thorough cleaning. This is the first step in any DIY project to paint a door like a pro. Use a degreaser to remove any built-up grime, especially on doorknobs and high-traffic areas. Rinse well with clean water and allow the door to dry completely.
Once the door is clean, grab your sandpaper and prepare for a light sanding session. This smooths out minor imperfections and creates a better grip for the paint. Choose sandpaper grit based on the door's condition:
- 120-grit - an ideal sandpaper grit size for preparing the door surface before applying two coats of paint for a smooth finish. For smooth doors or lightly textured surfaces.
- 150-grit - For moderately textured surfaces or lightly sanding previously painted doors.
- 220-grit - For lightly sanding between coat of primer or for very smooth, pre-painted doors.
Sand gently in the direction of the wood grain, focusing on uneven areas. Avoid sanding too deeply, as you don't want to damage the wood.
Inspect your door for any holes, dents, or scratches. Use an appropriate filler based on the door's material:
- Wood doors - Choose wood filler specifically designed for the type of wood (e.g., pine, oak).
- Laminate doors - Use a flexible caulk suitable for laminate surfaces.
Apply the filler generously, slightly overfilling the imperfection. Smooth it out with a putty knife or sanding block once dry. Sand the filled area lightly for a seamless finish.
Priming acts as a crucial bridge between the surface and the paint, ensuring better adhesion, smoother coverage, and increased durability. It's especially important for bare wood or when drastically changing paint colors.
When it comes to primer selection:
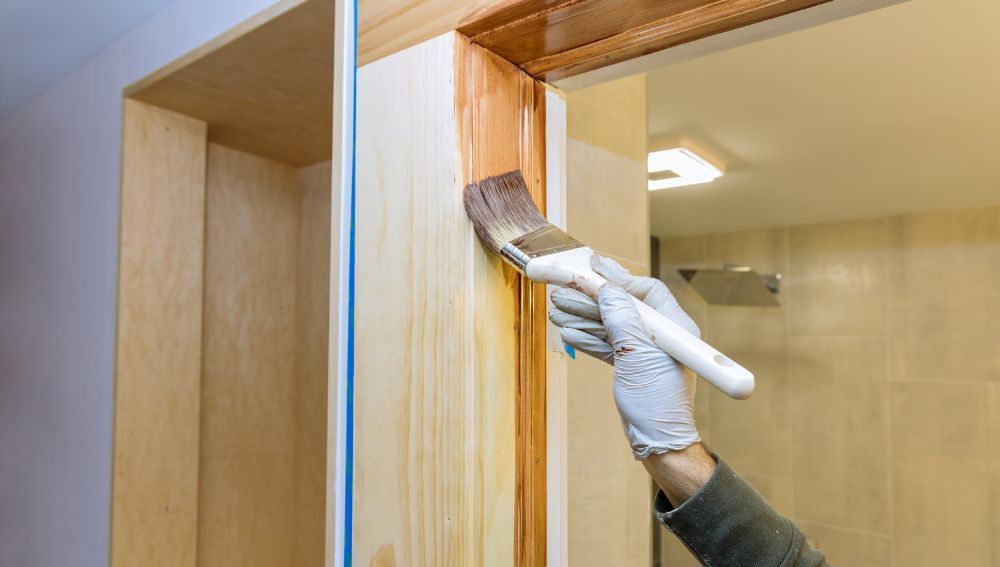
- Interior wood doors - Before applying new paint, remove old paint to ensure a smoother surface. Use a high-quality latex primer specifically formulated for interior wood.
- Exterior wood doors - Choose an exterior-grade primer designed for weather resistance.
- Laminate doors - Settle for a primer specifically designed to bond with laminate surfaces.
Apply the primer in thin, even coats following the manufacturer's instructions. Allow the paint to dry completely before applying the next, often requiring at least two coats for optimal coverage when you paint the door. Sand lightly between coats for an even smoother finish.
Painting Techniques - The Best Way to Paint
In this section, we’ll explore different tools and techniques to achieve a professional-looking, attractive, and long-lasting finish when you decide to paint interior doors. You can use a brush or roller or sprayer.
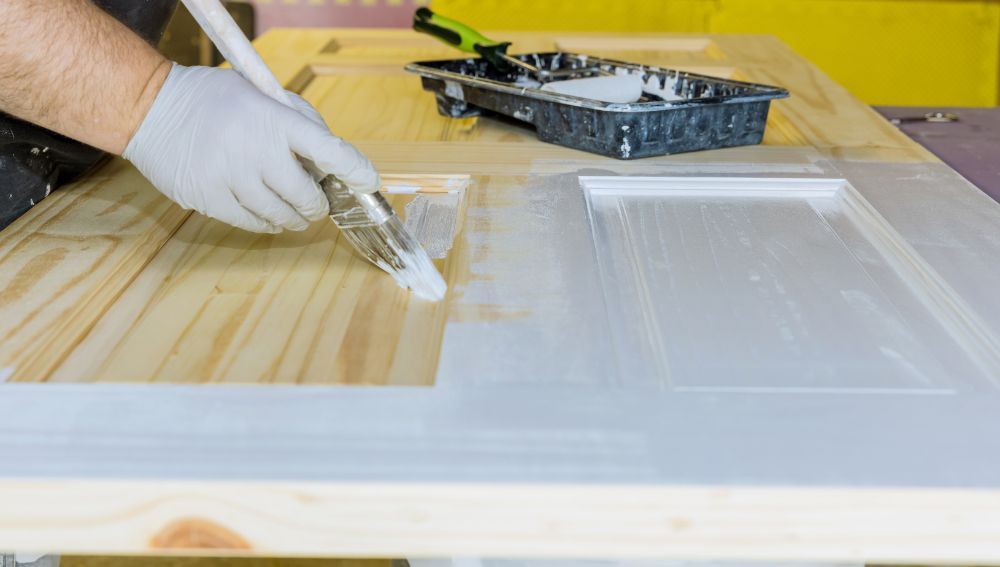
Brush is ideal for detailed work, corners, and trim. Using a paint sprayer can also achieve a professional look in these areas. It offers precise control and can handle intricate designs.
Use short, smooth strokes in the direction of the wood grain. Load the brush with a moderate amount of paint and avoid overloading to ensure the place is without drips.
Roller is efficient for large, flat surfaces like door panels. Delivers smooth, even coverage quickly, ideal for those looking to DIY paint a door without brush marks.
Use a lint-free roller and apply thin, even coats with light pressure. Roll in different directions on the first coat (up/down, then left/right) to ensure thorough coverage.
Sprayer is the fastest method for large, flat surfaces. It boasts a smooth, professional-looking finish with minimal brushstrokes.
Using a sprayer requires practice and proper safety gear (mask, respirator). Work in a well-ventilated area and use light, overlapping strokes with a paint sprayer for the best way to paint.
Priming
- Apply primer in thin, even coats using your chosen method.
- Start with the edges and corners using a brush for precise application.
- For flat panels, use a roller for efficient coverage.
- Allow each coat to dry completely before applying the next (refer to the manufacturer's instructions for drying times).
- Lightly sand between coats for a smoother finish.
Painting Panels and Details
- For paneled doors, start by painting the recessed panels with a brush.
- Work your way outwards, painting the raised moldings and rails.
- Use a smaller brush for intricate details and corners, ensuring the side of the door is as flawlessly painted as the rest.
- For a flawless finish, paint in the following order: recessed panels, rails, stiles, and lastly, the edges. Employ a paint roller for an even coat across larger surfaces.
Smooth Application
- Apply thin coats of paint to avoid drips and runs.
- Maintain a consistent brush angle and pressure throughout each stroke.
- Unload excess paint from your brush or roller before applying it to the door.
- Overlap each stroke slightly for even coverage.
- For a super smooth finish on the surface of the door, lightly sand between coats after the paint dries completely.
Drying Times
Allow each coat of paint to dry completely before applying the next. Refer to the manufacturer's instructions for specific drying times based on the paint type and temperature.
Avoid rushing the drying process, as this can lead to peeling or smudging.
Once the final coat is dry (usually 24 - 48 hours), wait an additional 24 hours before rehanging the door, ensuring the surface of the door has fully cured. This ensures the much paint is fully cured and ready to withstand daily wear and tear.
Applying the Topcoat
With your door adorned in a beautiful new coat of paint, it's time to apply the finishing touch: a protective topcoat. This vital step adds durability, enhances the paint's sheen, and makes cleaning easier.
The number of topcoats you need depends on the type of paint and desired sheen level:
- Latex or acrylic paint - Apply 1-2 coats for a satin or eggshell finish and 2-3 coats for a high-gloss finish.
- Oil-based paint - consider using a latex-based paint for easier cleanup and faster drying times. Typically requires only 1-2 coats, as it naturally offers good durability.
Note: The best tips for painting include thorough preparation and the right tools. Consult the manufacturer's recommendations for specific coat numbers and drying times based on your chosen paint and topcoat.
Door edges require special attention for a polished look. Here's how to tackle them like a pro: Learning the best way to paint includes mastering the use of a paint sprayer.
- Use a small, angled brush specifically designed for edges.
- Load the brush lightly with paint to avoid drips.
- Start by painting the top edge, holding the brush perpendicular to the door and using smooth, even strokes.
- Continue with the bottom edge, then the long vertical edges.
- For a crisp line, mask the edge if needed and carefully peel off the tape while the paint on the door still wet.
For final touches, give your door a final inspection. Scrutinize for any missed spots or drips. Use a small brush to touch up minor imperfections while the paint is still wet.
Gently remove any paint smudges on hardware or surrounding areas with a damp cloth and mild detergent.
Allow the topcoat to dry completely (refer to the manufacturer's instructions) before you reattach the door hardware.
Reassembly and Maintenance
With your door sporting a flawless new paint job, it's time to put it all back together and ensure its long-lasting beauty.
- Wait until the paint and topcoat are completely dry before reattaching hardware. This crucial step prevents damage to the fresh paint.
- Use the hardware labels you created during removal to ensure each piece finds its rightful place.
- Carefully align and screw each piece back securely to the door frame, avoiding overtightening. Use screwdrivers with the correct heads to prevent damage to the screws or hardware.
- For delicate hardware like knobs or handles, consider wrapping the threads with painter's tape to prevent scratching the paint during installation.
Regarding rehanging the door without scratching the paint, here’s how to go about it: carefully align and secure the door to avoid damage to the fresh paint on the side of the door. carefully align and secure the door to avoid damage to the fresh paint on the side of the door.
- Rehang the door on its hinges with assistance if needed. Lift the door carefully and align it with the hinge slots.
- Use a helper to support the door while you insert the hinge pins or screws. Ensure they're secure and the door hangs level.
- Open and close the door several times to check for any binding or scraping. Adjust the hinges slightly if necessary.
- For heavy doors, consider using sturdier hinges or adding additional support to prevent sagging or damage over time.
The following are some handy maintenance tips:
- Regular cleaning - Use a damp cloth and mild detergent to wipe down your door periodically. Avoid harsh chemicals or abrasive cleaners, as they can damage the paint finish.
- Touch-ups - Over time, minor nicks or scratches might appear. Address them promptly with touch-up paint matching your original color, especially important when maintaining the pristine look of interior doors. Apply a small amount carefully to blend seamlessly.
- Sun protection - for sun-facing doors, apply a second coat of paint that is UV-resistant to prevent fading. If your door receives direct sunlight, consider applying a UV-protective topcoat to prevent fading. Consult a paint specialist for recommendations.
- Seasonal adjustments - For exterior doors, inspect weatherstripping and caulk regularly and replace them when worn to maintain weather resistance.
Special Considerations for Door Paint
While the core painting process remains similar, special considerations come into play for exterior doors and doors made from unique materials.
For exterior doors, go the extra mile to ensure they withstand the elements:
- Choose paint specifically formulated for exterior use: These paints offer superior weather resistance, UV protection, and durability.
- Apply a primer specifically designed for exterior applications: This ensures proper adhesion and protects against moisture damage.
- Pay extra attention to weather stripping and caulk around the doorframe: The best way to paint involves careful preparation. Replace worn-out seals to prevent drafts and moisture infiltration, which can lead to warping and peeling paint. This maintenance can enhance the longevity of your DIY project.
- Consider applying an additional coat of clear sealant for enhanced weather protection: This is especially important in harsh climates with extreme temperatures or frequent rain/snow.
Different materials need you to adapt to different techniques for the utmost success.
Metal Doors:
- Use a metal-specific primer and paint to ensure proper adhesion and prevent rust.
- Degrease the surface thoroughly before priming and painting to remove any oils or residues that can affect paint adhesion, a crucial step in the DIY process to paint a door.
- Avoid sanding metal doors excessively, as it can damage the protective coating.
Fiberglass Doors:
- Clean the surface with a mild detergent solution before painting to remove any dirt or grime.
- Use a high-quality primer suitable for fiberglass to ensure proper bonding.
- Avoid using oil-based paints, as they may not adhere well to fiberglass.
Composite Doors:
Learn how to paint them with these tips for painting.
- Follow the manufacturer's recommendations for specific paint and primer types suitable for the composite material used in your door.
- These doors may have a pre-applied finish, so check if sanding or priming is necessary before painting.
Key Takeaways on How to Paint a Door
The key to achieving a professional-looking, long-lasting paint job lies in following best practices at every step:
Preparation is Paramount:
- Thorough cleaning, sanding, and filling create the perfect canvas for paint adherence. Don't underestimate the power of thorough prep!
- Choosing the right paint, primer, and tools based on your door's material and location ensures optimal results.
Technique Matters:
- Mastering brush, roller, or sprayer techniques gives you control and allows you to achieve a smooth, even finish. Practice makes perfect! Especially true when learning to achieve smooth, even coverage with minimal brush marks on your door paint project.
- Applying thin coats, allowing proper drying time, and following the order of painting sections are crucial for a professional-looking outcome. Use a foam roller for a smooth finish.
Details Make the Difference:
- Weatherproofing exterior doors and considering unique material needs ensures long-lasting beauty and functionality.
- Reassembling hardware carefully and maintaining the paint with regular cleaning and touch-ups preserve your masterpiece.
Get a Free Estimate Today
Our representatives are always ready to take your call and answer any questions you may have. Get a no-obligation quote for our door painting service today and we'll be happy to help!