
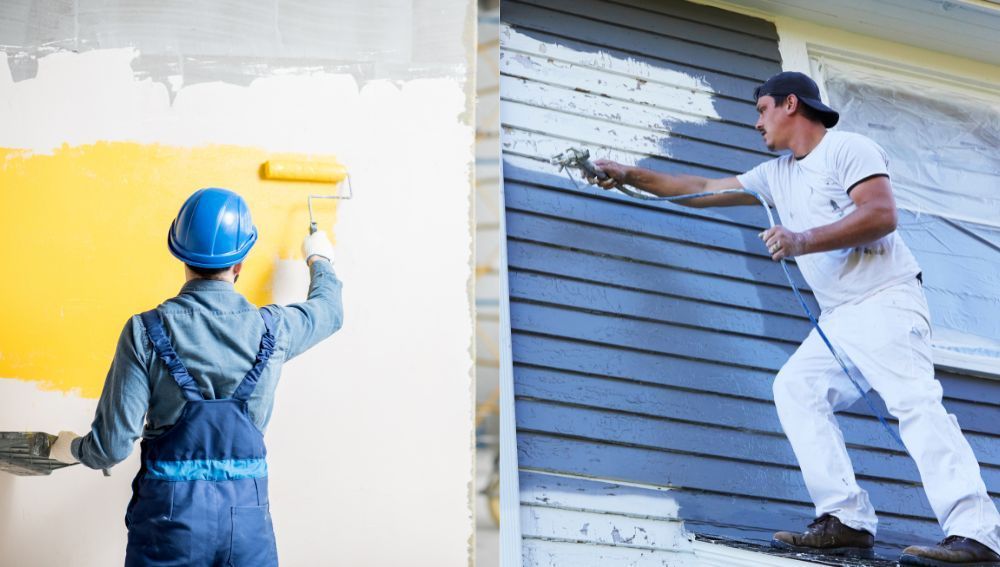
House Painting
Interior Services
Exterior Services
Floor Services
Drywall Services
Removal Services
1st Painting Contractors did a very careful job for the interior of my townhouse. The painters left an immaculate new appearance in my home. I am refreshed by the new look on all the walls. I would recommend 1st Painting Contractors for anyone looking for professional painters. I will definitely use them again.

How To Paint Your Home - 10 Interior and Exterior House Painting Tips
Looking to refresh your home with a brand new look? Painting is a powerful and affordable way to transform your space, both inside and out, perfect for home improvement projects. Whether you're tackling a single room or the entire house, a fresh coat of paint can boost your mood, increase your home's value, and make it shine.
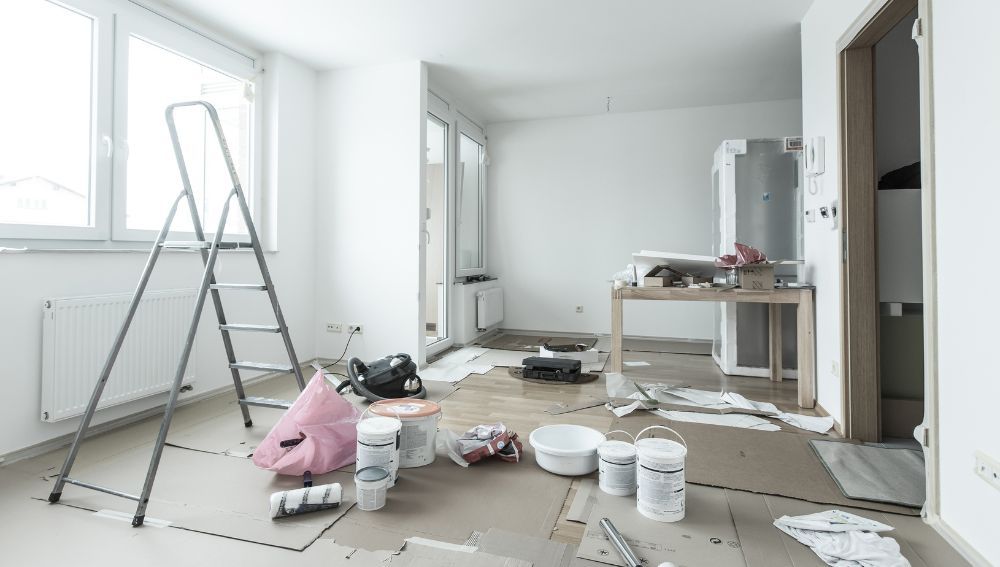
But before you grab the brush and dive in, there's something important to consider - painting services for the interior of your home. While DIY projects can be fun, hiring professional painters brings a wealth of benefits:
- Expertise - Professional painters have the knowledge, skills, and experience to handle any painting project, big or small. They know the right techniques, tools, and paint types to ensure a flawless, long-lasting finish.
- Time savings - Save yourself the time and hassle of prep work, painting, and cleanup. Professionals can complete the job quickly and efficiently, freeing you up to focus on other things.
- Quality - Painting companies use high-quality paints and equipment that deliver superior results. They also know how to properly prep surfaces, apply multiple coats, and caulk and seal for a professional finish.
- Peace of mind - Sit back and relax knowing your home is in good hands. Reputable painting services are insured and bonded, offering peace of mind and protection in case of any unexpected issues.
From painting walls and ceilings to trim and accents, professional painters can handle it all. They can even use sprayers for large areas or tackle challenging surfaces like stucco. Whether you're looking to paint a single room, refresh the entire house interior, or give your exterior a makeover, there's a painting service out there to meet your needs.
Here are 10 tips on how to paint a house:
Optimal Weather Conditions for House Painting
Choosing the right time to paint ensures your project adheres properly, dries evenly, and withstands the elements for years to come.
Moisture and paint don't always mix well. Aim for dry weather with low humidity is ideal for applying new paint as it ensures quicker drying times. Maintain humidity levels ideally below 60% to prevent water droplets from interfering with the paint's ability to adhere to the surface, especially important when painting an entire room. Think bright, sunny days with clear skies – perfect for wielding your brush!
Extreme temperatures can throw a wrench in your painting plans. Avoid painting in extreme conditions; use a pressure washer to clean the exterior before applying any gallon of paint. temperatures below 50°F (10°C) or above 85°F (29°C). In cold weather, the paint thickens and struggles to adhere, while scorching heat causes it to dry too quickly, leading to cracking and peeling. Opt for mild temperatures between 50°F and 85°F (10°C and 29°C) for optimal results.
Strong winds can wreak havoc on your painting session, blowing dust and debris onto the wet paint and creating an uneven finish. Choose calm days with wind speeds below 10 mph (16 km/h) for a smooth, controlled application.
Don't leave your painting project at the mercy of the weather gods! Regularly monitor Check weather forecasts and choose days that align with the ideal conditions discussed above to ensure the highest quality paint job for exterior projects. Consider starting your project early in the morning or later in the afternoon when temperatures are more moderate, especially when painting an entire exterior.
Invest in High-Quality Interior and Exterior Paint
While the allure of a quick, budget-friendly paint job is understandable, when it comes to your home's exterior, skimping on paint quality can be a costly mistake, and it’s important to know that advertisers’ offers may vary. Investing in high-quality paint isn't just an expense; it's an investment in beauty, durability, and ultimately, your wallet.
A higher-quality paint offers superior coverage, meaning fewer coats are needed to achieve a smooth, even finish. This translates to reduced paint usage and lower overall costs, particularly when selecting one gallon of paint for smaller rooms or projects.
Cheap paint might look good initially, but its joy is short-lived. Premium paints boast enhanced resistance to cracking, peeling, and fading, saving you from frequent repainting and associated expenses.
Think of high-quality paint as a long-term investment. Its superior durability extends the lifespan of your paint job by years, saving you time, money, and the hassle of frequent touch-ups.
With a plethora of options available, choosing the right type of paint can seem daunting. Here's a quick breakdown of common exterior paint types:
- Acrylic paint is a popular choice for painting professionals due to its quick drying time and durability. Popular choice for its versatility, affordability, and easy cleanup. Offers good durability and is a good option for most exterior surfaces.
- Latex - Similar to acrylic in many ways, but often boasts higher levels of moisture resistance. A good choice for areas prone to humidity or rain, especially when painting the exterior to withstand the elements.
- Oil-based - Traditionally known for exceptional durability, but requires ventilation and proper disposal due to VOCs. Consider for specific situations like trim or doors.
The harsh rays of the sun can wreak havoc on your paint job, causing fading and discoloration.
Go for paint with built-in UV protection to ensure your vibrant colors stay true for years to come. Look for paints with a high Solar Reflectance Index (SRI), indicating their ability to reflect sunlight and keep your home cooler.
Thorough Surface Preparation Before the Painting Process
Just like a painter wouldn't dream of starting on a dirty canvas, a successful exterior paint job hinges on through surface preparation. Start with a thorough cleaning, often recommended to wash the house before applying new paint. Dirt, grime, and mildew act as barriers, preventing the paint from adhering properly. Consider power washing (for suitable surfaces) or vigorous scrubbing with a phosphate-free detergent to achieve a squeaky-clean canvas.
Imperfections such as cracks, chips, and loose paint can become breeding grounds for moisture and further damage; addressing these is crucial in home improvement. Take the time to repair and fill these areas using appropriate patching compounds suited to your surface material, ensuring a smooth base for new paint. Once dry, ensure a smooth finish by sanding the repaired areas and any rough surfaces.
Even the cleanest surface might have minor imperfections. Use a high-grade primer to smooth these out before applying ceiling and trim paint for a flawless finish. To ensure the paint adheres evenly and creates a flawless finish, sanding is crucial. Use the appropriate grit sandpaper (start with medium, finish with fine) and sand with the grain of the surface before applying new paint. Light sanding is key; avoid over-sanding, which can damage the material.
Don't skip the primer! This essential step acts as a bonding agent, ensuring the paint adheres seamlessly to the surface and is crucial for applying new paint. Choose a primer specifically formulated for your exterior material and apply a thin, even coat.

Don’t Skimp on Primer on your Paint Job
Imagine spending hours meticulously choosing the perfect color, carefully applying each coat, and dreaming of your freshly painted masterpiece... only to see the paint peel, crack, or fade within months. Sound like a nightmare? This unfortunate reality can unfold if you underestimate the crucial role of primer in your exterior painting project. Always use the recommended amount of paint and primer to avoid issues.
A primer is more than just an extra layer; it's the foundation that ensures your paint avoids peeling paint.
- Adheres evenly and permanently - a key consideration when applying two coats as recommended by painting experts. Primer creates a uniform surface, allowing the paint to bond seamlessly and resist peeling or flaking.
- Delivers consistent color - By evening out the surface's absorbency, primer prevents patchy color application and guarantees a smooth, vibrant finish - a top tip for painting your home.
- Provides extra protection - Depending on the chosen primer, you can gain added benefits like moisture resistance, stain blocking, and improved durability, further safeguarding your home's exterior.
Primers cater to various needs, including preparing interior walls and ensuring that the chosen paint adheres well and displays its true color. Selecting the right one depends on your specific surface:
- Wood - Settle for oil-based primers for superior adhesion and moisture resistance.
- Vinyl - Use a water-based acrylic primer specifically formulated for vinyl siding to ensure the new paint adheres evenly and permanently.
- Masonry - Choose a masonry primer to penetrate porous surfaces like brick and stucco.
Once you've chosen your primer, remember these application tips for painting which are essential for achieving the best results in home improvement projects.
- Clean and prepare the surface - Ensure a clean, dust-free canvas for optimal adhesion by using plastic sheeting to cover your belongings.
- Apply evenly - this is among the best tips for painting any accent wall or room in the interior of your home. Use a brush or roller to apply a thin, even coat, following the manufacturer's instructions when you’re painting. Choose the highest quality paint job for lasting results.
- Don't rush - take your time to achieve the best results, which may vary depending on the amount of paint and technique used. Allow the primer to dry completely before moving on to the paint.
Mindful Color Selection
Color selection is an art, not just a whim. Choosing the right hues can elevate your home's curb appeal, while the wrong ones can create an eyesore.
Your home's architectural style deserves a color scheme that sings in harmony. For traditional and colonial styles, consider classic whites, creams, and grays. Modern and contemporary homes can rock bolder palettes with blacks, blues, or even pops of vibrant colors, making them ideal for a splash of personality in your interior of your home.
While expressing your individuality is important, being a good neighbor matters too. Consider the existing color schemes in your neighborhood. Choosing a wildly different color might clash with the overall aesthetic and create an eyesore. Aim for complementary colors that blend harmoniously with the surrounding environment.
Natural light plays a fascinating trick on paint colors, influencing the hue you choose when you’re painting your home. South-facing houses receive more sunlight, making colors appear warmer and brighter. Opt for cooler hues like blues or greens to balance the warmth. North-facing houses receive less sunlight, making colors appear cooler and duller. Consider this when choosing paint for your interior walls to ensure the desired effect. Choose warmer colors like yellows or oranges to add vibrancy.
Before committing to a full gallon, purchase sample pots and paint swatches on different areas of your house at different times of day. This allows you to see how the color changes with sunlight and make an informed decision you'll love for years to come.
Bonus Tip: Consider advertisers’ offers that appear relevant to your painting project, as they can offer valuable savings on home services and paint supplies. Consider using a color visualization tool online or through paint companies. These tools allow you to upload a picture of your house and virtually "try on" different color combinations, helping you envision the final outcome before making a purchase.
Test Paint First Before You Paint Your House
Test painting is a simple yet crucial step that can save you time, money, and major color regret.
Paint isn't a static entity. Its true beauty unfolds under the ever-changing canvas of the sky. That vibrant blue you adored in the store might appear washed out under midday sun, while the subtle gray you envisioned could transform into a gloomy green in the shade. To avoid such surprises, test your chosen color in different lighting conditions.
Paint large swatches (bigger than just a chip!) on different sides of your house and observe how they change throughout the day, which is a useful tip for painting the exterior to achieve the best look. Morning light casts a warm glow, midday sun reveals the color's true essence, and afternoon shade introduces cooler tones.
Tiny paint chips are cute, but they don't tell the whole story. Imagine staring at a postage stamp versus a full-blown painting – the latter gives you a much better sense of the color's true impact.
Consider larger test patches, at least 2ft x 2ft, to accurately gauge the color's presence on your home's exterior, a tip often recommended by painting professionals. This allows you to assess its interaction with your home's architectural features, landscaping, and overall aesthetic.
Sometimes, initial love can fade in the light of day (quite literally in this case!). So, don't rush into judgment after painting your test patches; understanding how paint behaves is a key aspect of the best painting practices. Live with the color for a few days.
Observe it under different weather conditions, at different times of the day, and even get feedback from trusted friends and family. This extended observation period allows you to truly understand if the color resonates with you, complements your home's overall character, and meets the terms of use recommended by painting experts, ensuring that results may vary but generally satisfy.
Use Appropriate Tools to Paint your Home
You need a set of tools for a successful house painting project. These are brushes, sprayers, and rollers - essential tools for painting professionals.
- Brushes - Your brush collection should include angled brushes for trim and detailed work, flat brushes for larger surfaces, and specialty brushes for specific areas like window frames. Opt for natural bristles for oil-based paints and synthetic bristles for latex or acrylic paints.
- Rollers - Invest in a good-quality nap roller with appropriate nap length for your surface texture to apply two coats efficiently. A variety of nap sizes exist, from short naps for smooth surfaces to longer naps for rough textures. You'll also need a roller frame and extension pole for comfortable reach.
- Sprayers - While convenient for large areas, consider your experience level and project size before opting for a sprayer. They require practice and proper technique to avoid overspray and uneven application.
Investing in high-quality brushes and rollers with sturdy handles and well-secured bristles ensures smooth application, minimizes paint waste, and makes the job easier on your body, leading to the highest quality paint job possible.
Clean your brushes and rollers thoroughly after each use with appropriate solvents or detergents. Rinse well and store them properly, hanging brushes by their bristles and laying rollers flat to prevent warping. This ensures your tools are in prime condition for that highest quality paint job. Taking care of your tools ensures they'll be ready for your next painting adventure, keeping in mind the recommendations from painting experts.
Bonus Tip: Don't forget the essentials! Stock up on drop cloths, painter's tape, sandpaper, putty knives, and safety gear like goggles and gloves for a safe and efficient painting experience.
Attention to Detail
Trims, windows, and doors are the crown jewels of your painted canvas. To make them shine, master the art of precise lines and clean finishes. Utilize painter's tape strategically to create crisp borders. For tight corners and intricate details, employ angled brushes with steady hands and focused strokes.
Drips and uneven coverage can mar even the most vibrant paint job. Avoid these common mistakes:
- Dip brushes only the tip into the gallon of paint to prevent overloading and drips, ensuring coverage of up to 400 square feet per gallon.
- Maintain a consistent brush angle when applying paint for even coverage.
- Overlap strokes slightly to avoid visible lines and ensure complete coverage.
- Work in small sections and clean up drips immediately with a damp cloth.
The Final Flourish:
Once the main areas are painted, don't neglect the finishing touches:
- Touch up any missed spots or imperfections with small brushstrokes.
- Inspect for drips and splatters on windows, doors, and landscaping, and remove them gently.
- Peel off painter's tape carefully at a slight angle to avoid damaging the new paint.
Consider adding decorative touches such as painted shutters, address numbers, or a vibrant front door to further personalize your home's exterior and elevate its curb appeal.
Prioritize Safety as a House Painter
Ladders are essential tools for reaching high areas, but using them incorrectly can lead to serious injuries when painting the house. Follow these golden rules:
- Choose the right ladder - Select a ladder with a weight capacity exceeding your own weight and the weight of your paint supplies. Opt for a sturdy extension ladder for most exterior painting needs.
- Set it up right - Place the ladder on stable, level ground at a 4:1 ratio (4ft base for every 1ft of height reached). Secure the ladder feet and ensure both sections are fully locked, if applicable.
- Climb confidently - Maintain three points of contact at all times – two hands and one foot – while climbing or descending. Never climb the top two steps of a stepladder or stand on the top rung of an extension ladder.
Have the following as your protective gear:
- Eye protection - Safety glasses or goggles shield your eyes from paint splatters, dust, and debris.
- Hand protection - Gloves protect your hands from paint chemicals and minor abrasions. Choose gloves suitable for the paint type you're using. This is essential for protecting your hands, especially if you're using a one gallon of paint or more for your project.
- Respiratory protection - Consider wearing a respirator, especially when working with solvent-based paints or sanding to protect your home’s air quality, and to prevent inhaling harmful fumes or dust particles.
- Appropriate clothing is necessary to protect yourself, especially when painting areas like countertops, where spills and splashes are more likely. - Wear long pants, long sleeves, and closed-toe shoes to protect your skin from paint spills and sun exposure.
Always be mindful of your surroundings:
- Work in good weather - Avoid painting in windy conditions, extreme temperatures, or when rain is imminent.
- Be aware of power lines - Keep a safe distance from electrical lines and always check overhead clearances before raising a ladder.
- Clean up spills promptly - Wipe up paint spills on walkways, driveways, and landscaping immediately to prevent accidents and staining.
- Proper disposal - Dispose of paint cans, rags, and other materials responsibly according to local regulations.
Maintenance is Key for Both Interior and Exterior House Painting
To ensure your new paint job retains its beauty and protects your home for years to come, regular maintenance is key.
Don't wait for major problems to arise. Conduct regular inspections of your painted surfaces, looking for signs of wear and tear:
- Peeling or chipping paint - Address these promptly with touch-up paint to prevent further damage and moisture infiltration.
- Cracks - Seal minor cracks with appropriate caulk to prevent water infiltration and further expansion before you paint the house, an important step before applying new paint.
- Fading - While some fading is natural, excessive fading might indicate poor paint quality or inadequate UV protection. Consider re-painting if necessary.
For long-term care:
- Regular cleaning - Gently wash your exterior surfaces with a mild detergent and water to remove dirt and grime that can contribute to paint degradation.
- Trim control - Keep trees and shrubs trimmed away from your house to prevent moisture buildup and potential damage to the new paint.
- Gutter maintenance - an often overlooked step in preparing your house for new paint. Ensure your gutters are clean and functioning properly to prevent water from pooling and damaging the paint.
Conclusion
Painting your home's exterior isn't just about aesthetics; it's an investment in beauty, protection, and value. By following the guidelines outlined in this guide and utilizing home services when needed, you'll be well-equipped to achieve a stunning and long-lasting paint job that will boost your home's curb appeal and increase its value. The key lies in meticulous planning, choosing the right tools and materials, and executing each step with care.
Embrace the satisfaction of a DIY project, witness the transformation of your home, and enjoy the pride and joy of a beautifully painted house that stands the test of time.
Get a Free Estimate Today
Painting a house or business is more than just applying a fresh coat of paint. It's an investment that can add value to your property and improve its curb appeal. Whether you're looking to sell your home or simply want to make it look nicer, painting is always a good idea. Give us a call today and experience the difference we can make.